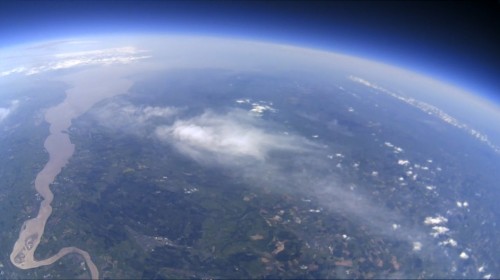
| Liz: Regular readers will be very familiar with the name Dave Akerman. Dave has been sending Raspberry Pis to the stratosphere under weather balloons since we launched the Pi in 2012, and his work in helping schools develop their own in-house space programs has been fantastic to watch. He and his friend Anthony Stirk have just produced a telemetry add-on board for the Raspberry Pi to help schools (and everybody else) reproduce the sort of spectacular results you’ve seen from him before. Here he is to introduce it: over to you, Dave! High Altitude Ballooning is an increasingly popular hobby (I nearly said that interest has been “ballooning”, but fortunately I stopped myself just in time …), bringing what is termed “near space” within the reach of pretty much anyone who is willing to put in the effort and spend a moderate amount of money.
Although it’s possible to successfully fly and retrieve a balloon with a simple GSM/GPS tracker, the chances are that this will end in failure and tears. GSM coverage in the UK is nowhere near 100%, especially in rural areas which is where we want (and aim) the flights to land. The next step up, in reliability and price, is a “Spot” tracker which works solely via satellites, but those don’t work if they land upside down. Also, neither of these solutions will tell you how high the flight got, or record any science data (e.g. temperature, pressure), or indeed tell you anything about the flight until they land. If you’re lucky. A lost flight is a sad thing indeed.
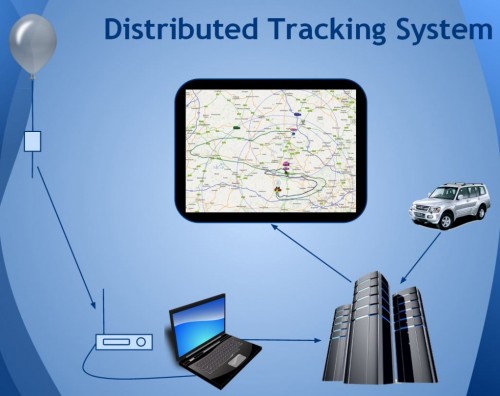
For some countries (e.g. USA, but not the UK), if you are a licensed amateur radio operator you can fly an APRS tracker, in which case the flight will be tracked for you via the ground-based APRS network run by other radio hams. Sadly UK laws prohibit radio hams transmitting from an airborne vehicle, so APRS is out for us. For these reasons, pretty much everyone involved in the hobby in the UK, and many other countries, uses radio trackers operating in an ISM (Industrial, Scientific and Medical) band where airborne usage is allowed. These work throughout the flight, transmitting GPS co-ordinates plus temperature and anything else that you can add a sensor for. Many radio trackers can also send down live images, meaning that you can see what your flight is seeing without having to wait for it to land. Here’s a diagram showing how telemetry from the flight ends up as a balloon icon on a Google map:
What’s not shown here is that, provided you tell them, the other balloonists will help track for you. So not only will you be receiving telemetry and images directly via your own radio receiver, but others will do to. All received data is collated on a server so if you do lose contact with the flight briefly then it doesn’t matter. However, this does not mean you can leave the tracking up to others! You’ll need to receive at the launch site (you have to make sure it’s working!) and also in the chase car once it lands. The expense of doing this is small – a TV dongle for £12 or so will do it, with a £15 aerial and a laptop, ideally with a 3G dongle or tethered to a phone. Traditionally, balloonists build their own radio trackers, and for anyone with the skills or the time and ability to learn programming and some digital electronics, this is definitely the most rewarding route to take. Imagine receiving pictures of the Earth from 30km up, using a piece of kit that you designed and built and programmed! So if you are up to this challenge (and I suspect that most people reading are) then I recommend that you do just that. It takes a while, but during the development you’ll have plenty of time to research other aspects of the hobby (how to predict the flight path, and obtain permission, and fill the balloon, etc.). And when you’re done, you can hold in your hand something that is all your own work and has, to all intents and purposes, been to space.
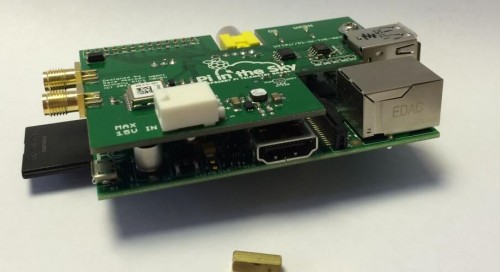
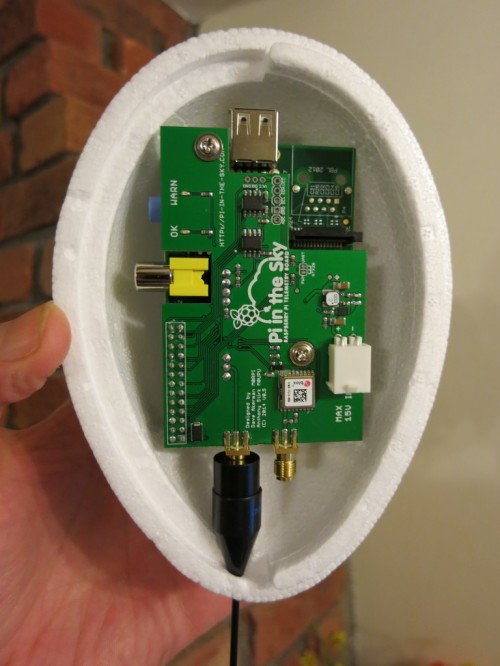
For some though, it’s just not practical to develop a new tracker. Or you might be a programming whizz, but not know which end of a soldering iron to pick up. It was with these people in mind that we (myself and Anthony Stirk – another high altitude balloonist) developed our “Pi In The Sky” telemetry board. Our principle aim is to enable schools to launch balloon flights with radio trackers, without having to develop the hardware and software first. It is also our hope that older children and students will write their own software or at least modify the provided (open source) software, perhaps connecting and writing code for extra sensors (the board has an i2c connection for add-ons). The board and software are based on what I’ve been flying since my first “Pi In The Sky” flight over 2 years ago, so the technology has been very well proven (approximately 18 flights and no losses other than deliberate ones!). So far the board itself has clocked up 5 successful flights, with the released open-source software on 3 of those. Here’s the board mounted to a model B (though we very strongly recommend use of a model A, which consumes less power and weighs less):
It comes in a kit complete with a GPS antenna, SMA pigtail (from which you can easily make your own radio aerial), stand-offs for a rigid mounting to the Pi board, and battery connectors. Software is on https://github.com/piinthesky, with installation instructions at http://www.pi-in-the-sky.com/index.php?id=support, or there is a pre-built SD card image for the tragically lazy. We do recommend manual installation as you’ll learn a lot. By now you’re probably itching to buy a board and go fly it next weekend. Please don’t. Well, buy the board by all means, but from the moment you decide that this is the project for you, you should task yourself with finding out all you can about how to make your flight a safe success. For a start, this means learning about applying for flight permission (which, if you want to launch from your garden at the end of an airport runway, isn’t going to be given). Permission is provided together with a NOTAM (NOtice To AirMen) which tells said pilots what/where/when your launch will be, so they can take a different path. You also need to learn about predicting the flight path so that it lands well away from towns or cities or motorways or airports. I hope I don’t need to explain how important all of this is.
There’s lots more to learn about too, for example:
None of this is complicated (it’s not, ahem “rocket science”), but there is a lot to know. Don’t be surprised if the time between “I’ll do it!” and “Wow, I did it!” is measured in months. Several of them. In fact, worry if it’s less than that – this research takes time. We will be producing some teaching materials, but meantime please see the following links:
As for the board, it provides a number of features borne out of a large number of successful flights:
The open-source software provides these features:
Finally, anyone interested in high altitude ballooning, using our board or not, should come to the UKHAS Conference on 16th August 2014 at the University of Greenwich. Anthony and I will be presenting our board during the morning sessions, and will run a workshop on the board in the afternoon. For tickets click here. |
Friday, July 25, 2014
Pi in the Sky: hardware for high-altitude balloonists from Dave Akerman

Subscribe to:
Post Comments (Atom)
No comments:
Post a Comment